Back to blog
How to Remove Image Background

Picture this: You capture a photo and the foreground looks awesome, but the background is another story. Whether it doesn’t align with the message you’re going for or there are too many distractions, it’s just not going to work. You feel the need to replace it—and fast.
If the subject of your photo is sharp, on-brand, and exactly how you want it, you don’t have to discard it just because the background isn’t suitable. You can keep your masterpiece by isolating it from the rest of the image using a background remover app.
How does a photo background remover app work? Simply put, it completely erases the background of your photo without affecting the quality so that you can replace it with a better option.
This is not to be confused with other tools that may just delete objects from the background of your photos, rather than cut out the background entirely.
Finding a background remover app that is easy to use and gets the job done quickly can be difficult. Luckily, Photoleap has got you covered.
Bring your vision to life in these 3 simple steps.
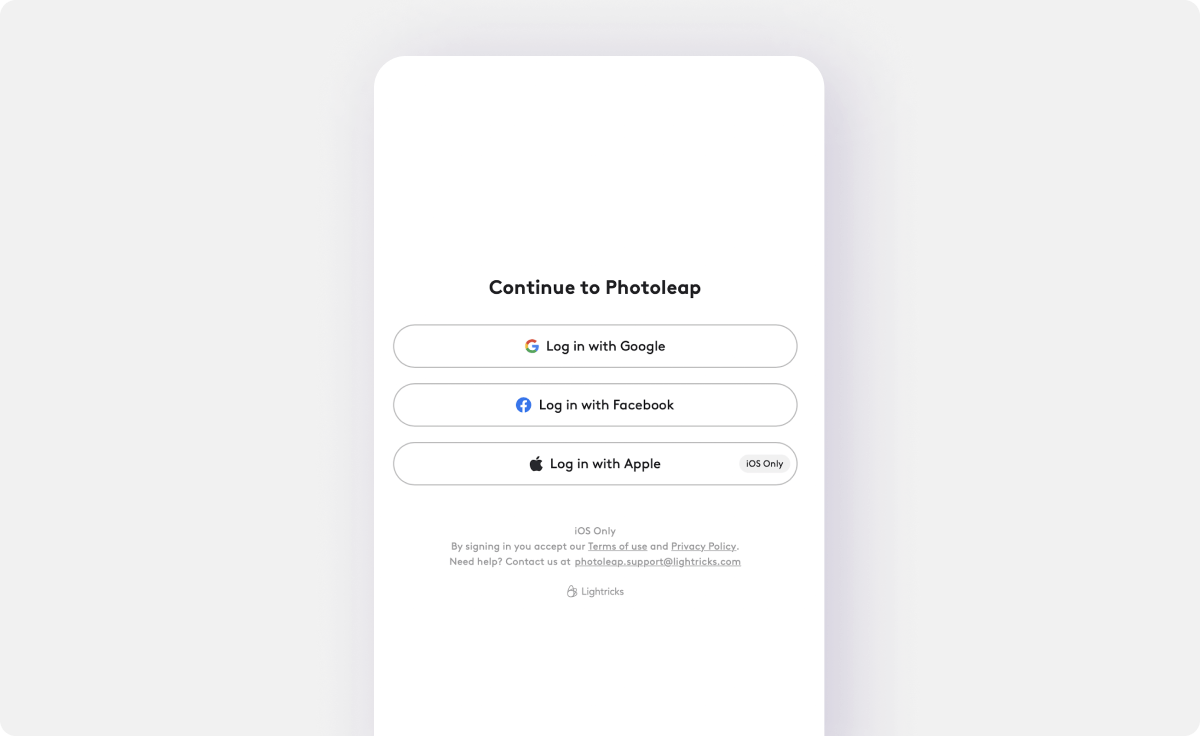
To set up your account, sign up for the 7-day free trial using Google, Facebook, or Apple. At the end of this free trial, you can decide whether you’d like to subscribe to the paid monthly or yearly plan.
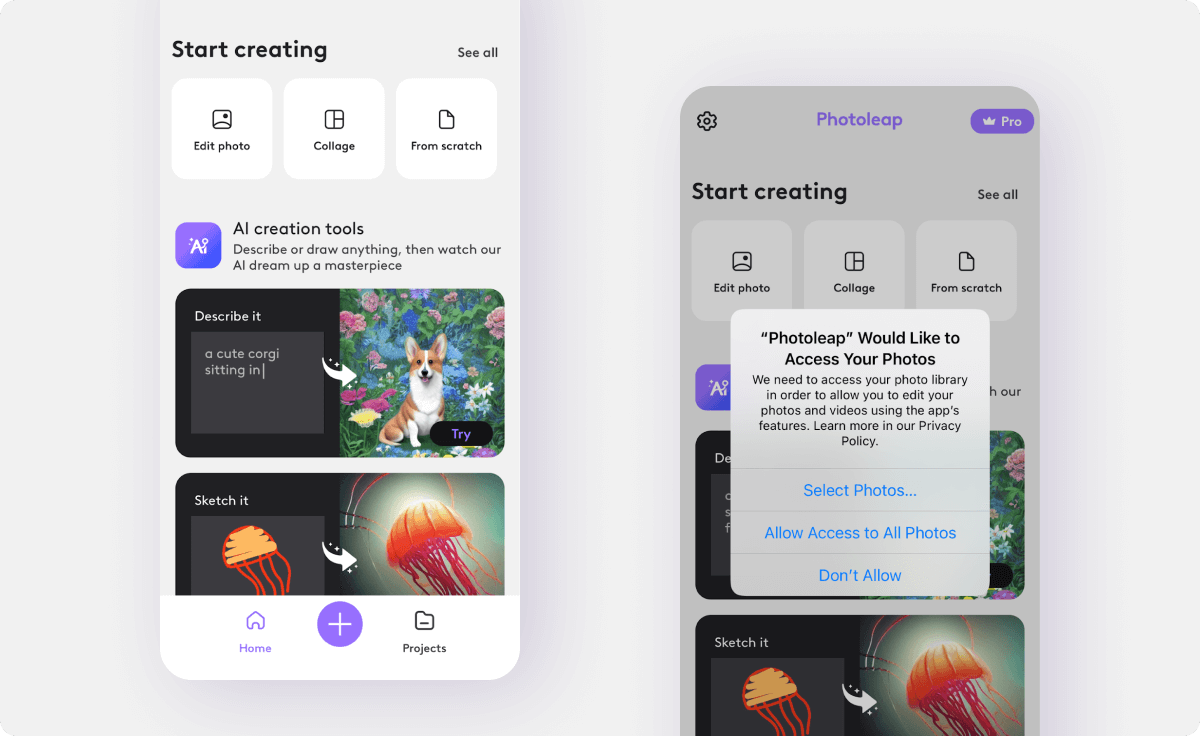
You can open your previously captured photo in one of two ways. Either use the “Edit photo” button at the top of the screen or the big purple plus sign at the bottom
A pop-up will ask if Photoleap can access your photos. Select “Allow Access to All Photos” before tapping your chosen image.
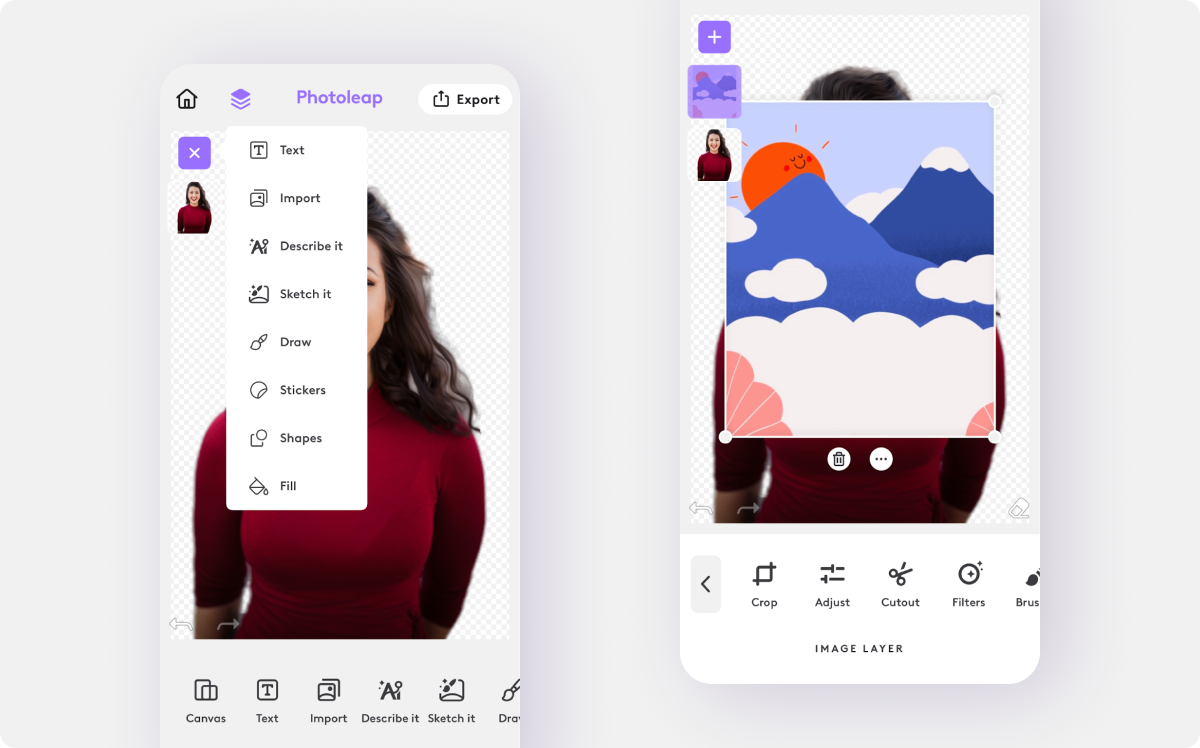
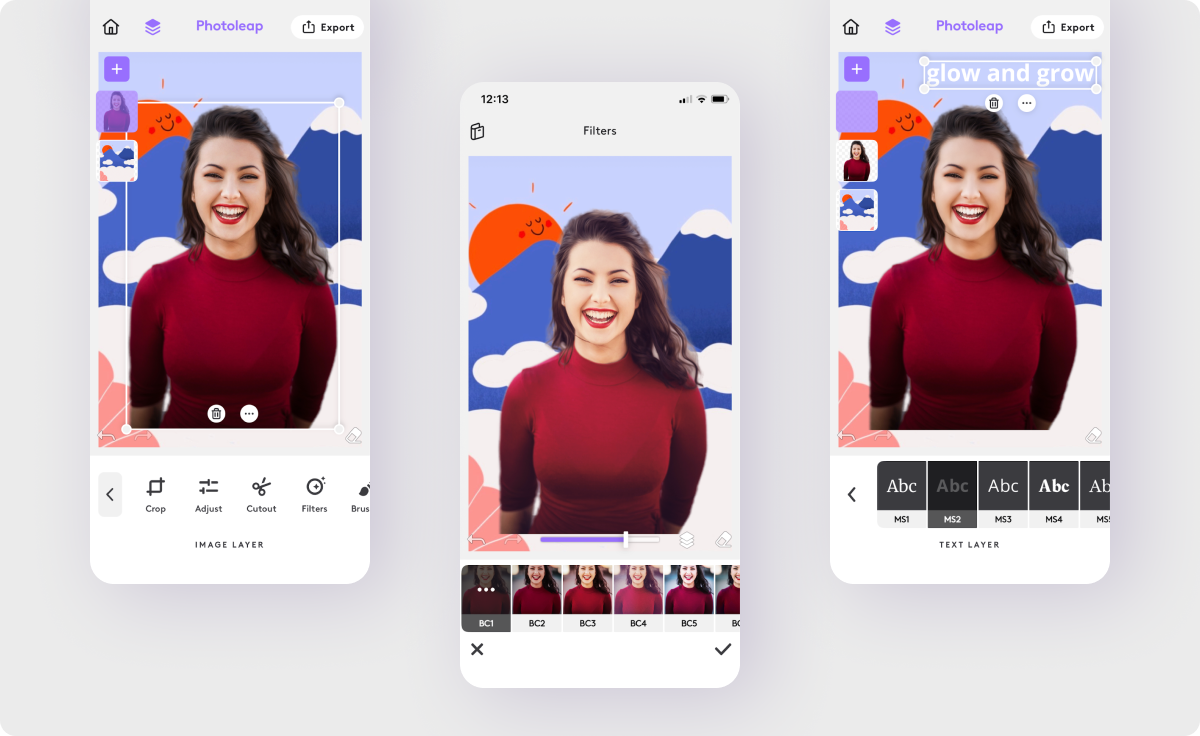
You should now be able to see your image in the Photoleap editor screen. You will also notice the various editing options along the bottom menu.
Tap the “Cutout” button to be taken to the associated menu. The great thing about this feature is that you can “Autocut” different aspects of a photo, such as a person, hair, clothes, and even the sky. And of course, you can remove the background from an image.
To do this, select the part of the photo you’d like to keep in the foreground from the “Autocut” menu. In this example, you would select “Person” and then tap the check icon once you’re happy with the app’s work.
In the unlikely event that there’s still a section of the background present after using “Autocut,” you can manually remove it by tapping “Autocut” again and then “Erase.” Tap and drag on the section to use an eraser on-screen as you would in real life. You can also adjust the size of your eraser, if needed, by dragging the sliding bar on the right menu.
But the fun doesn’t end there!

Make sure you save a new background that you’d like to add to your photo to your camera roll. Follow these 3 additional steps to import it efficiently.
In the main editing screen, you will see the layer icon next to the home button in the top left corner. Tap this, select the purple plus button, and then hit “Import.”
The imported background will pop up over the background remover image from before. If it doesn’t fill the photo proportions, tap and drag the corners to adjust it accordingly.
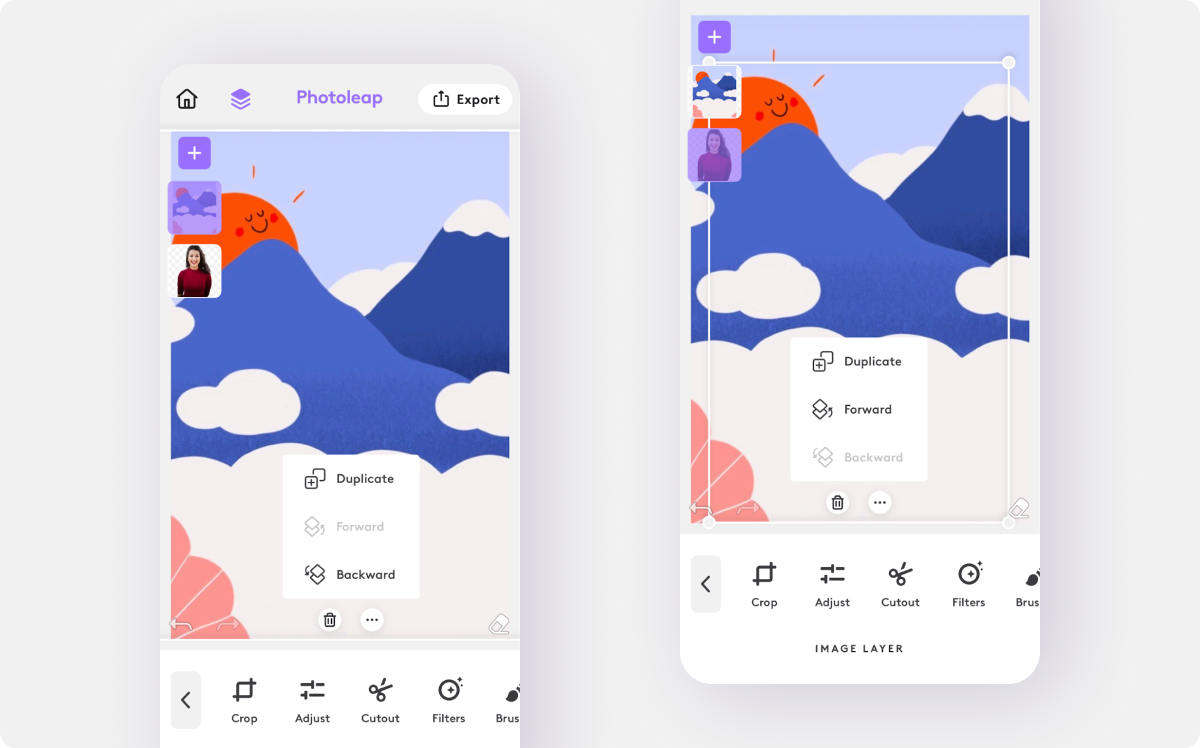
Find the three horizontal dots icon at the bottom of the image. Tap this and select “Backward” to place your background behind your foreground photo.
A similar way to do this is to tap your background remover image from the layer menu on the left side. Select the three horizontal dots icon and tap “Forward” to bring this layer to the front.
Is the foreground layer not quite sitting how you’d like? Tap and drag to move it. Likewise, you can tap and drag the corners to resize it until it’s just right.
Use Photoleap to take your image to the next level by making further tweaks. Tap on each layer to explore filters, doodles, retouches, and effects. The app is super intuitive, making the editing process effortless and enjoyable.
You can also access other awesome features like text, draw, stickers and shapes from the main editing menu. The possibilities are endless!
Once your photo is polished and ready to make an impact on the world, export it in just a couple of taps. Tap “Export” in the top right corner of the main editing screen to begin this process.
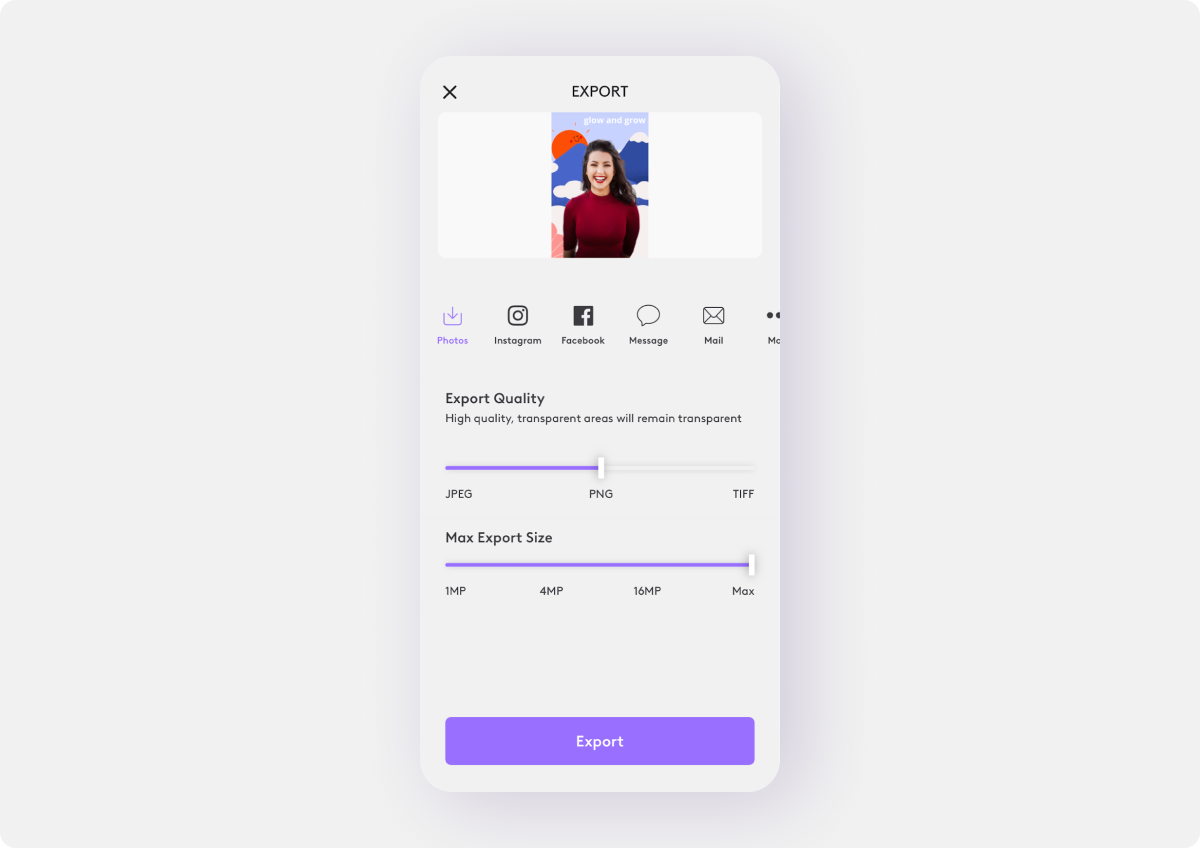
Short on time? Save your creation to your camera roll to deal with later using the “Photos” icon. Alternatively, if you want to share it immediately, you have some options:
And more!
The “Export Quality” section allows you to pick a file type according to its quality. Drag the slider bar to be told what would make sense for your photo in alignment with your goals.
You can also choose an export size. Generally speaking, the higher the export size, the better the quality of the image.

Thanks to apps like Photoleap, you can speed up and improve your workflow when it comes to editing photo backgrounds without losing the essence of the foreground. Photoleap also has other extensive features to help you create unique photos that elevate your social media profiles, no matter what your skill level.
So, what are you waiting for? Give it a try today to push the limits of your imagination.